Table of Contents
Assignment 1: Warm-Up
Due Thursday, September 10 2026, 11:59 pm Central Time
Submissions handed in by the due date receive a small on-time bonus.
All students are granted a pre-approved extension or “grace period” of 24 hours after the due date. Late submissions are accepted during the grace period with no penalty.
The grace period expires Friday, September 11 2026, 11:59 pm Central Time, after which no further late submissions are accepted (or are even possible).
This project is an individual homework. No group work is allowed.
Introduction
It is not uncommon for students come into this course without basic C software development skills, and invest a great deal of time and frustrating effort in the first two projects before concluding they will not pass the course and must drop. We have created this simple warm-up to determine whether or not students are prepared to work on C programming projects. Most students should find this project to be relatively easy (a few hours of work, mostly understanding the APIs). If you do not find this project to be relatively straight-forward, you may want to reconsider whether or not you are ready to take this course.
Relation to Lectures and Reading
None. This project requires only C programming skills and basic familiarity with command line interfaces and Makefiles that incoming students should already possess. Mastery of the material covered in a class like CSC4103 should be enough to make this project straightforward.
Project Objectives
- Ensure students have a working Linux development environment.
- Ensure students can code, compile, test and debug simple C programs.
- Introduce and demonstrate the ability to use basic POSIX file operations.
- Introduce and demonstrate the ability to process command line arguments.
- Introduce and demonstrate the ability to catch and handle run-time exceptions.
- Introduce and demonstrate the ability to return informative exit status.
- Demonstrate the ability to research and exploit non-trivial APIs.
- Demonstrate the ability to construct a standard Makefile.
- Demonstrate the ability to write software that conforms to a Command Line Interface (CLI) specification.
Deliverables
- A single C source module that compiles cleanly (with
gcc, with no errors or warnings). - A
work/Makefileto build the program (targets:all,check) - Two screen snapshot(s) from a
gdbsession:results/backtrace.png: showing a segfault and associated stack-traceresults/breakpoint.png: showing a breakpoint and variable inspection
- A
results/README.mdfile with identification information, a description of the included files, the smoke-test cases in thechecktarget, and any other information about your submission that you would like to bring to our attention (e.g., research, limitations, features, testing methodology).
Environment Setup
Please refer to this page for a description of how to install a development environment needed to work on the group projects.
Creating your Initial Assignment 1 Clone using Classroom50
Congratulations, at this point you are ready for working on the assignment!
Over the course of this semester we will rely on Classroom50 to manage assignments. For more information on Classroom50 please see here.
In this course, we will manage assignments in repositories hosted on Github. The moment you accept an assignment on Classroom50, you will get access to your own repository that is a clone of the original repository containing the starter code. Your clone of this repository is private by default. This means that nobody except yourself and the course staff is able to see it.
You are responsible to keep the visibility of the repository and its content private. If you change your repository’s visibility to public or make the content of your repository available to others in any way, then you make yourself vulnerable to allegations of plagiarism - with all related consequences.
Please be also aware that by accepting an homework assignment you agree on sharing your name and your LSU email address in the context of this course with Github. Please be aware that the work you turn in for this course, along with the respective student identifiers will be submitted to Github for review, for providing feedback, for performance analysis, and for grading purposes.
Here’s what to do next:
- Open a browser and navigate to this url.
- If asked, select your name from the list
- Click the “Accept this assignment” button.
You should see a new page which says “Open Repository” The page will provide the link to your assignment 1 repo, e.g., https://github.com/hkaiser-assignments/csc7103-fall-2026-csc7103-fall2026-assignment1-your-name. Click on that link.
You will now see the homepage for your assignment 1 repo.
At this point, you’ve created a clone of the starter repository on Github.
Next, if you are working on your local machine, you’ll want to create a clone of the assignment starter repository on your local machine as well. For that step you need to have all prerequisites for this course installed on your local computer (CMake, Git, Visual Studio Code).
If you prefer working fully online using codespaces, follow the instructions here to create a new Github Codespaces instance and attach a fully online version of VSCode to it.
Open the Repository in the Docker Container
The starter repository has been set up in a way that allows to seamlessly run project in an docker environment. For this:
- Again, make sure Docker, VSCode, and the VSCode Remote Development Extension Pack are installed
- Choose
Reopen in Containerin VScode. For details refer this tutorial - Wait for the Docker container to be pulled.
- After the new VSCode window pops out you are good to go.
Project Description
- (if you are not already familiar with them) study the following manual sections:
- POSIX file operations:
- strerror: function that interprets the error codes returned from failed system calls.
- getopt: the framework we will use for argument handling in all projects for this course.
- gdb, and the
run,bt,list,print, andbreakcommands in particular: a Linux debugger for C/C++ programs.
You will probably find understanding getopt to be the most difficult part of this project. Feel free to seek out other examples/tutorials for these functions, but make sure you cite those sources in your results/README.md.
Your task is to write a program that copies its standard input to its standard output using low-level file descriptor operations. Your program must handle several optional features with specific and sometimes conflicting requirements.
Core Functionality
Your program executable should be called assignment1 and must:
- Read from file descriptor
0(STDIN_FILENO) using theread()system call - Write to file descriptor
1(STDOUT_FILENO) using thewrite()system call - Continue until EOF is encountered
- Exit with return code
0on success - Do not use stream-based functions (
fopen,fclose,fread,fwrite)
Command Line Arguments
Parse arguments using getopt_long. Your program must accept the following optional arguments in any combination and order:
--input=filename: Redirectstdinto the specified file--output=filename: Redirectstdoutto the specified file--segfault: Deliberately cause a segmentation fault--catch: Register aSIGSEGVhandler before the segfault occurs--buffer-size=N: Use a custom buffer size ofNbytes (default behavior undefined – you must determine and document reasonable behavior)--verbose: Enable verbose logging of bytes copied (implementation details unspecified)
Complex Requirements and Ambiguities
Argument Processing
- If
--inputis specified multiple times with different filenames, your program must detect this and decide whether to report an error or use the last specified file. Document your decision in a design rationale. - If
--outputis specified multiple times, apply the same logic as--input. - If both
--inputand--outputpoint to the same file, your behavior is undefined – document what happens and why.
Error Handling
- Report file open failures to
stderr(FD 2) with an error message that must include: (1) which argument caused the problem, (2) the filename, (3) the reason. The exact format is your choice, but it must be distinguishable from other error types. - Exit codes: Use
2for--inputfailures,3for--outputfailures,1for unrecognized arguments. You must justify why these codes were chosen. - If a
write()call partially succeeds (writes fewer bytes than requested), your program must either retry or fail. Choose one and justify the decision.
Signal Handling
- The
--catchflag must register a handler forSIGSEGVbefore any other operations occur. - The handler must log an error message to
stderrand exit with code4. - However, if
--segfaultis also specified, the handler should catch the fault. If only--catchis specified with no--segfault, the handler should remain registered but never triggered (verify this works correctly). - Your handler must be async-signal-safe – explain which functions are safe to call and why.
Segmentation Fault
- Place the code that causes the segfault in a separate subroutine (not main).
- The subroutine must be called only if
--segfaultis specified, and only after all setup is complete. - If
--catchis specified along with--segfault, the handler must catch and handle the fault gracefully. - If
--segfaultoccurs without--catch, the program will crash – document this expected behavior.
Buffer Size and Performance
- Your choice of default buffer size will affect performance. Measure and document the performance of your implementation with at least three different buffer sizes (e.g., 256 bytes, 4KB, 64KB) on a large file (at least 10MB).
- Create a test file and time your program with
timecommand; include results inresults/performance.md.
Verbose Mode
- If
--verboseis specified, your program must log the number of bytes copied tostderrwithout affecting the data written tostdout. - The format of verbose output is your design choice – justify why you chose it.
Execution Order and Clarifications
Operations must occur in this order, but only if specified:
- Parse all arguments
- Perform file redirection (
--inputand--output) - Register signal handler (if
--catchspecified) - Cause segfault (if
--segfaultspecified) - Copy
stdintostdout(if no segfault occurred)
Clarification: If --segfault and --output are both specified, does the output file get created before the segfault? You must choose a behavior and justify it in your design document.
Deliverables
assignment1.c: Your implementationMakefile: Build with-Wall -Wextra -gflagsresults/README.md:- Explain your design choices for ambiguous requirements
- Justify your error codes and messages
- Explain why you chose specific buffer sizes
- Document partial write handling
- Clarify behavior for edge cases
results/design-rationale.md:- Explain your argument handling for duplicate options
- Discuss signal-safety requirements and how you met them
- Explain the order of operations for complex argument combinations
results/performance.md:- Include timing results for different buffer sizes
- Explain which buffer size you chose as default and why
results/backtrace.png: GDB backtrace screenshot (from--segfault)results/breakpoint.png: GDB breakpoint inspection screenshot (null pointer check)
Testing
Modify the make check target to test:
- Basic copy functionality
- File redirection (both input and output)
- Error handling for missing files
- Unrecognized arguments
- Duplicate
--inputarguments (document expected behavior) - Duplicate
--outputarguments (document expected behavior) - Same file for both input and output (document what happens)
--catchwithout--segfault(verify no crash)--verbosemode output format- Various buffer sizes
- Large file copying (10MB+)
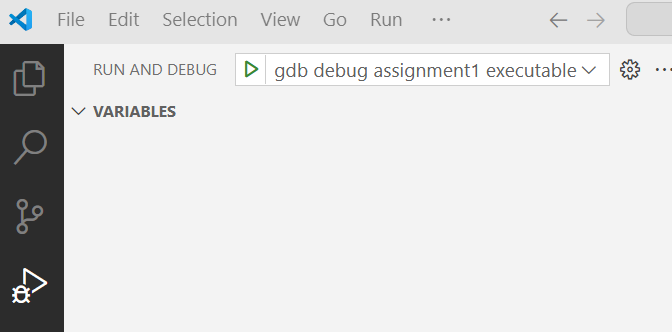
The starter repository contains a file
.vscode/launch.jsonthat configures running theassignment1executable using the built-in gdb debugger. This allows you to launch the executable in gdb from the VSCode debugging pane:
In order to supply command line arguments to the executable while running in gdb, you need to edit the
argsconfiguration setting, e.g.,:"args": [ "--input", "foo", "--output", "bar", ],
Submission
Once you’ve finished everything, you are ready to submit your work. You are submitting your assignment results as commits that have to be pushed to the github repository. The section about staging and committing changes in VSCode gives you a good introduction on how to do this.
We will be using Classroom50 to collect assignments and Moodle to release your scores. We will use Git for version control in the class. If you are new to Git, there are plenty of tutorials online that you can read, e.g., this one.
Please also note, that once you push to your repository, Github will compile and run your code automatically. This will result in a  being added to the home page of your repository, telling you that all tests you added have successfully passed. If you see a
  instead, then one or more of the tests in your code have failed and you will have to debug your code. Simply commit and push again once you have fixed the problems.
There is also an introduction to Git available that describes the overall concepts and the use of Git from a command line. It also answers some frequently asked questions.
We have a Github tutorial you might want to have a look at as well.
Last but not least, you can have a look at this document if you are interested in knowing more about Classroom50.
And that’s it! You’re done!