Build and Run Code using VSCode
This document describes the steps that you should take in order to build and run your code once you have opened a cloned assignment repository using VSCode. The procedure is the same regardless of whether your work on your local machine, on one of the computers in the computer lab, or on github codespaces.
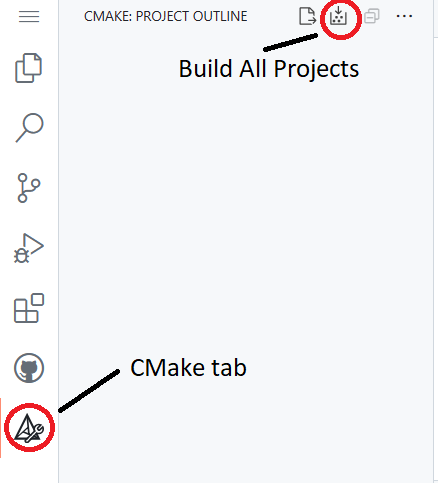
All assignment projects rely on CMake (which is a tool that generates build systems) to help building your code. For this reason, you will first need to invoke the build using the CMake tool by opening the CMake tab on VSCode and click the Build All Projects icon on the top as seen in the image below:
You may be asked to select a compiler kit like shown here:

Please select the kit named Clang 18.1.3 x86_64-pc-linux-gnu (if you are using our pre-configured Docker image).
The project should now configure and should be being built.
The last step is to select the Testing tab in VSCode and click the Run Test icon to execute your code as shown here:
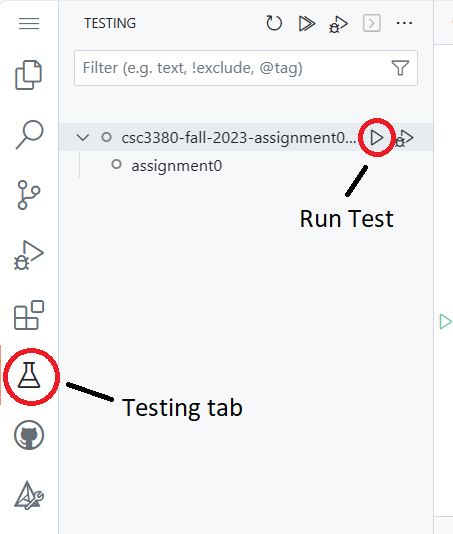
If the code was correctly built then this step should run the code and show the output in the VSCode Output window.